A learning list is a structured hierarchy of learning sets. It is suitable for a larger series of lessons, a curriculum, or anything in between. It can be used to express both sequence and scope, representing an ordered sequence of resources bound together by a common purpose. It can contain lessons that are specific to content, as well as lessons needed for skill building. A learning list can be used to create larger units or even a full curriculum.
1. Log in. Choose Share in the upper right corner of the screen. Select the Contribute Resources from the drop down menu.

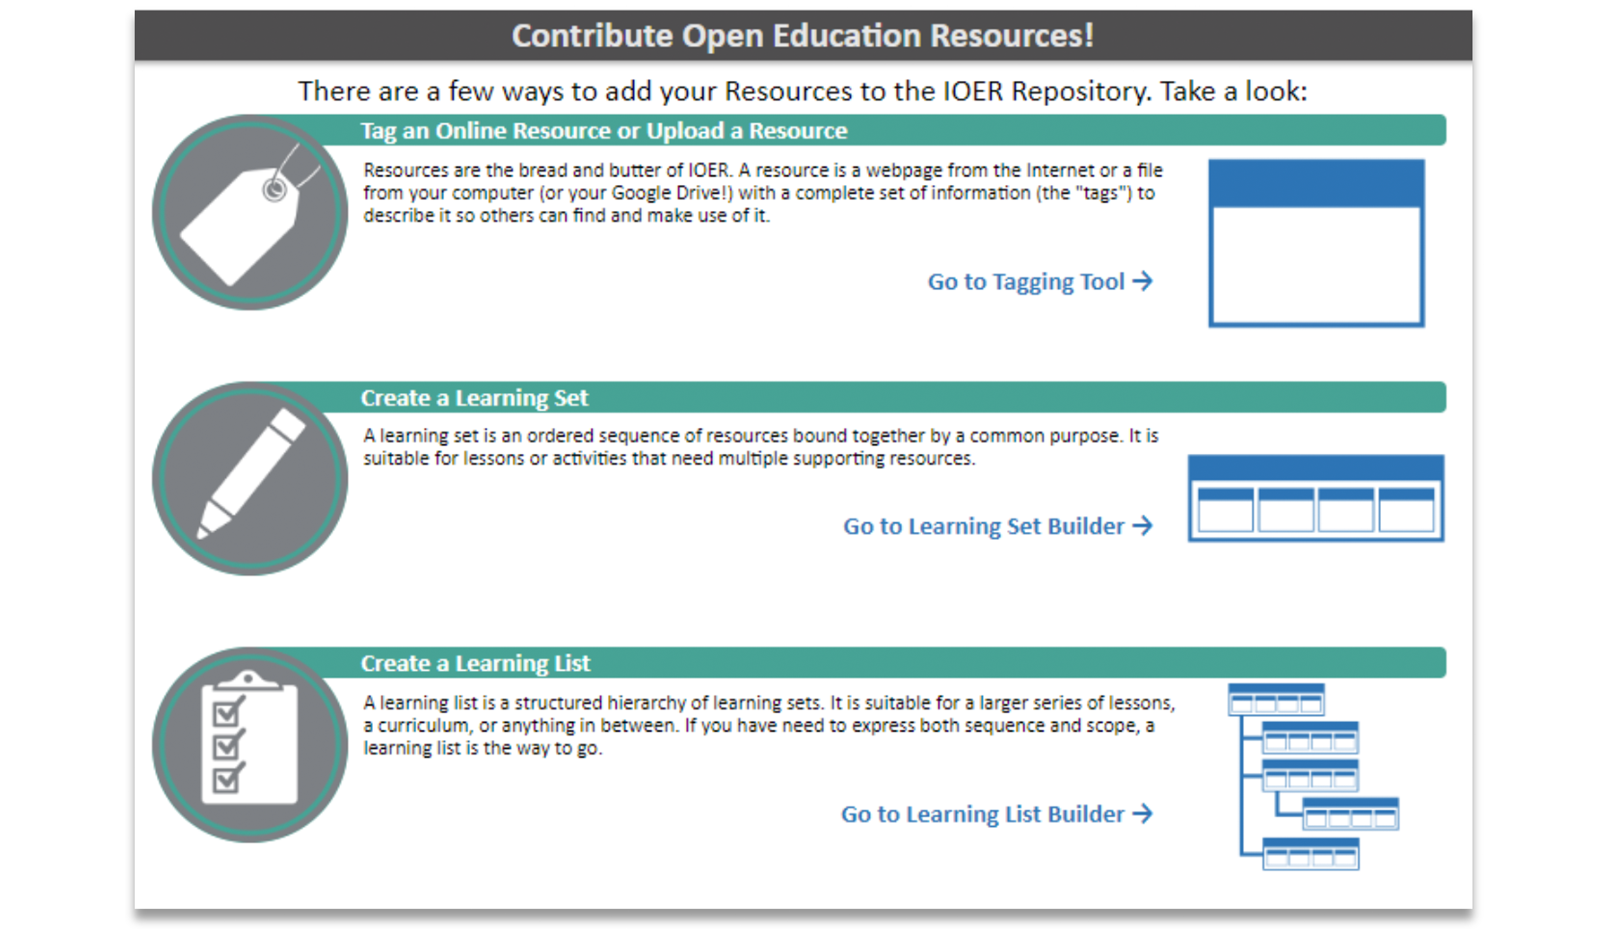
2. From the Contribute Open Education Resources menu, select Go to Learning List Builder.
3. Type in a title, provide a brief description, and assign the list to a specific organization (optional).
4. Click Create.
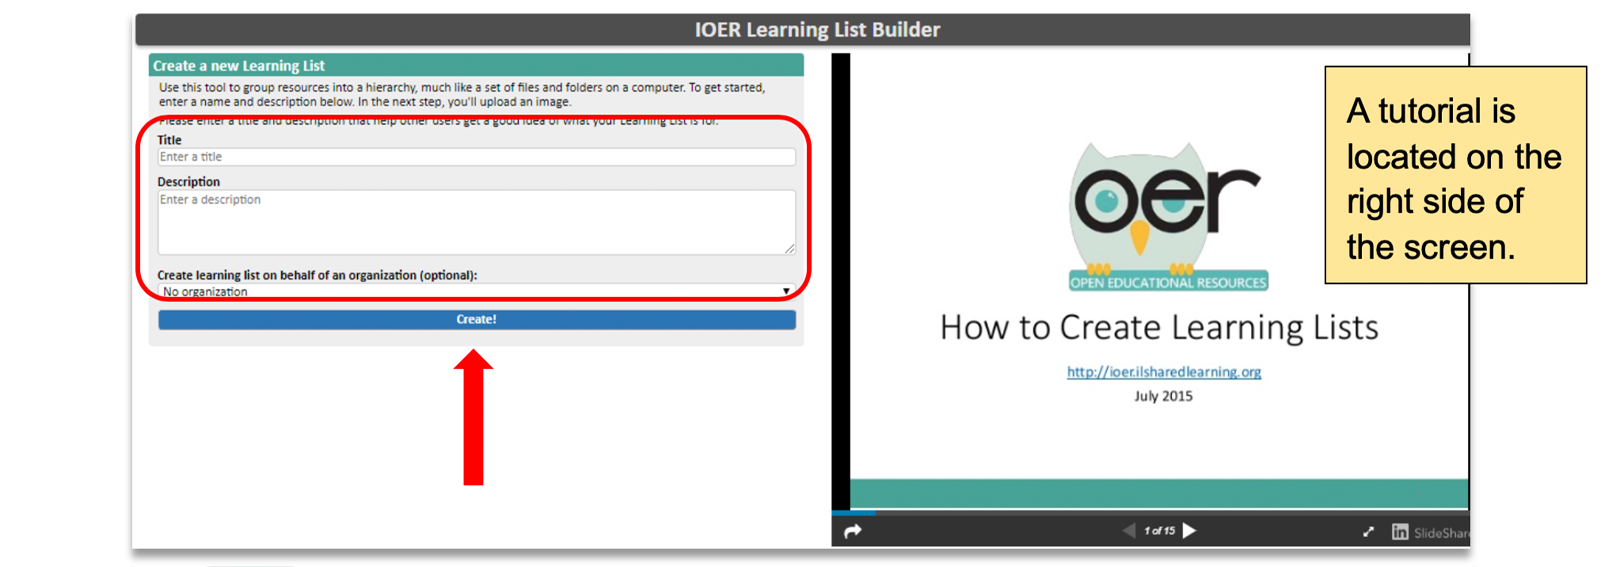
A tutorial is located on the right side of the screen.
5. The next step begins the building process for the Learning List. On the top half of the screen you are asked to provide a rich description.

Adding levels is covered in step 12. Adding standards is covered in step 7.
6. The lower half of the screen requests additional information. Fill in each text box or select from the drop down menus. You can also upload a photo for your list image.
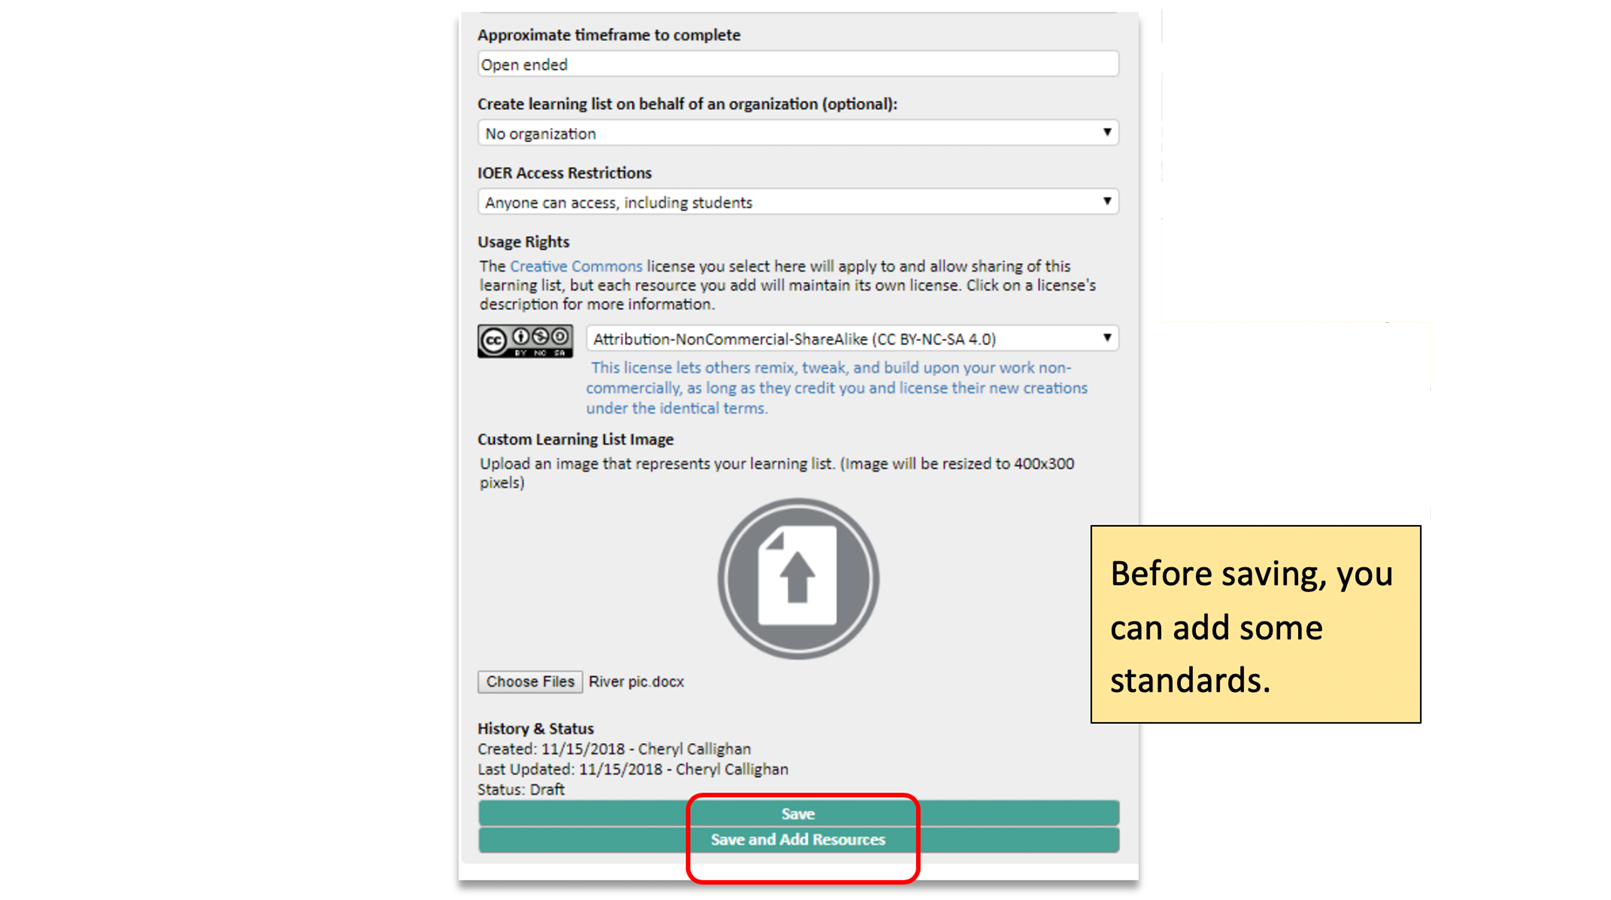
Before saving, you can add some standards.
7. Click Add Learning Standards from the upper right section.

8. Select a Standard Body, a Grade Level, and the Content Area. Click Save and Finish.

9. Click on the standards you want to add. Then click Save and Finish.

10. Repeat the process to add additional standards.
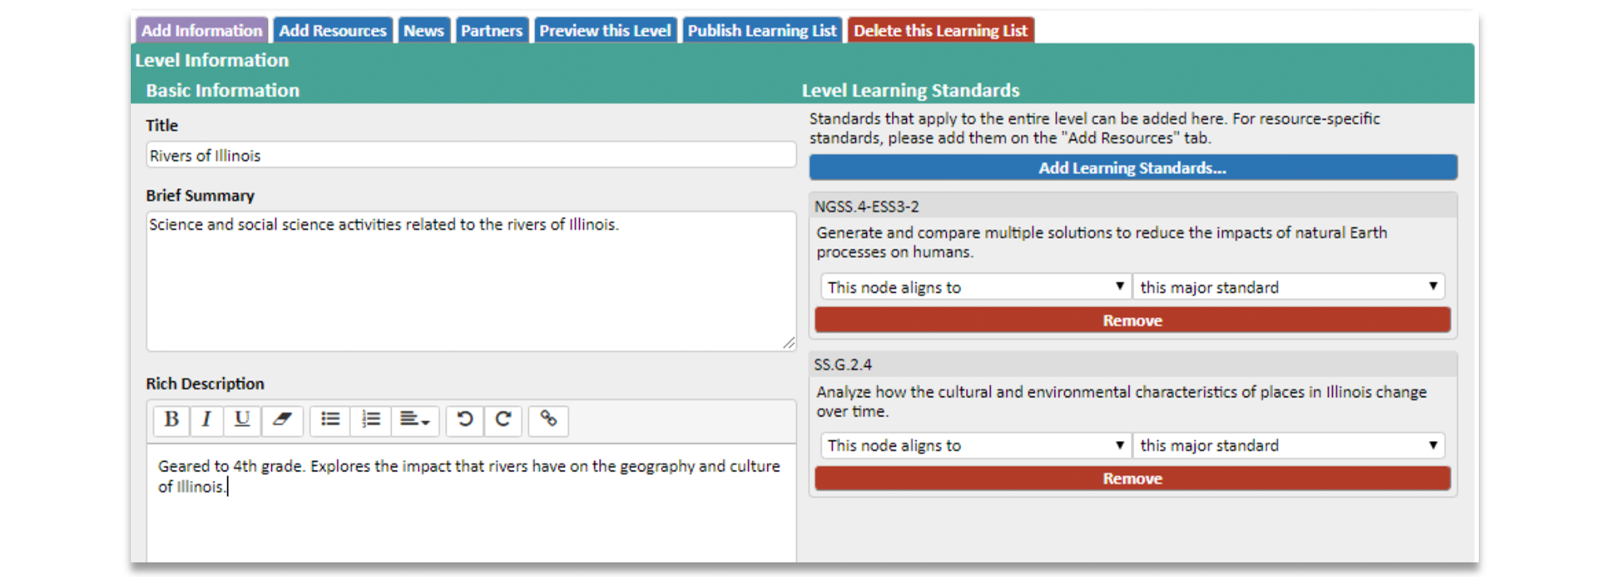
11. Once you have added all the standards, scroll to the bottom and click Save. This will save and update the set, but allow you to keep working. You will receive a confirmation message that the update has been successful.

The Learning List is a hierarchical list of related information and resources. It is organized much like a family tree. The top level topic is the “parent” or main topic. Additional levels beneath this heading are “child/children” levels or subtopics. As the list is built, some child levels can become parent levels as resources are added under each subheading.
12. To add another level, click on Select in the upper left corner. You will then be asked to give this level a title. The screen is identical to the one for the parent level.

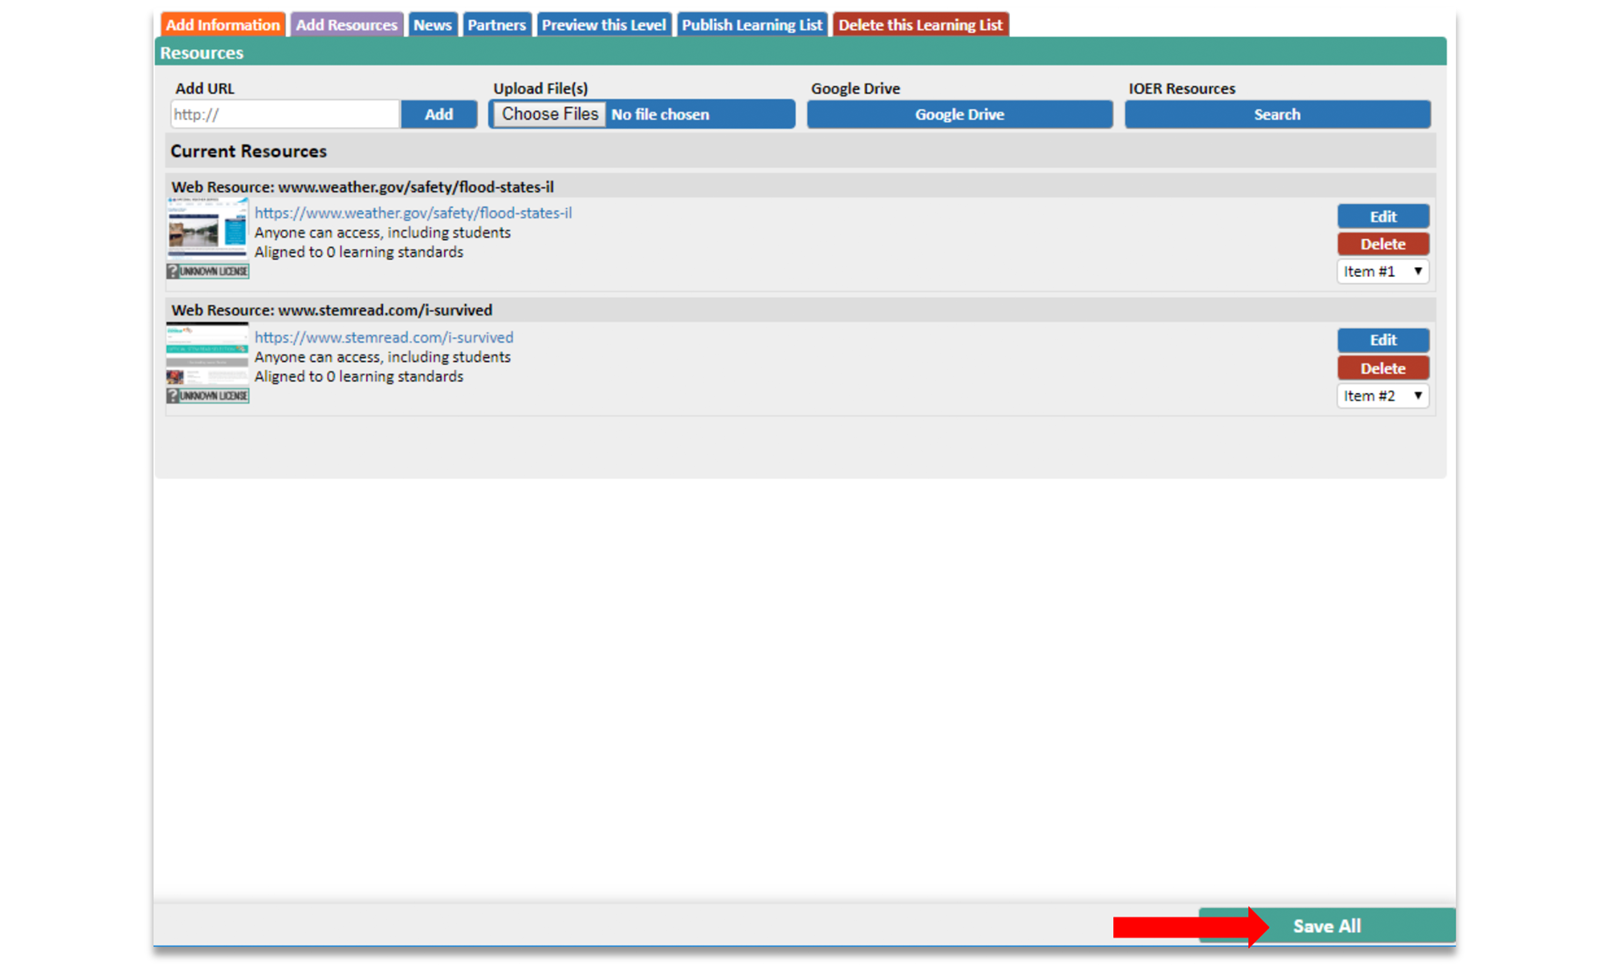
13. You are now ready to begin adding resources to your list. Click the Add Resources tab near the top of the screen.

14. Type in or copy and paste the URL of the resource you want to add. Click Add. The resource will appear. You must click Save in order to add this resource.

15. Once you have selected the resources, scroll to the bottom of the screen and click Save All.
16. Once you have completed the set, click on the Publish Learning List tab. You will be asked to confirm that you want to publish the list.

17. Once you confirm, you will be redirected to the tagging screen. Tag the resource. See the Tag Resources user guide for more information.

18. Click Finish at the bottom of the screen. You will receive a confirmation that also contains a link to view the resource.
19. You can access the resource from your dashboard. You can find them displayed under Recent Resources or by clicking Resources I Created in the left side menu.
